Paver joint washout is a frequent challenge for homeowners and businesses in Florida, especially after storms and heavy summer downpours. Thankfully, the right approach and materials can protect patios, driveways, and walkways—even during the stormiest seasons. At GCM Best Services, we have spent years working with Florida’s unique weather and soil conditions, helping our neighbors in Orlando and Central Florida keep their outdoor spaces strong and beautiful.
Understanding paver joint washout after storms
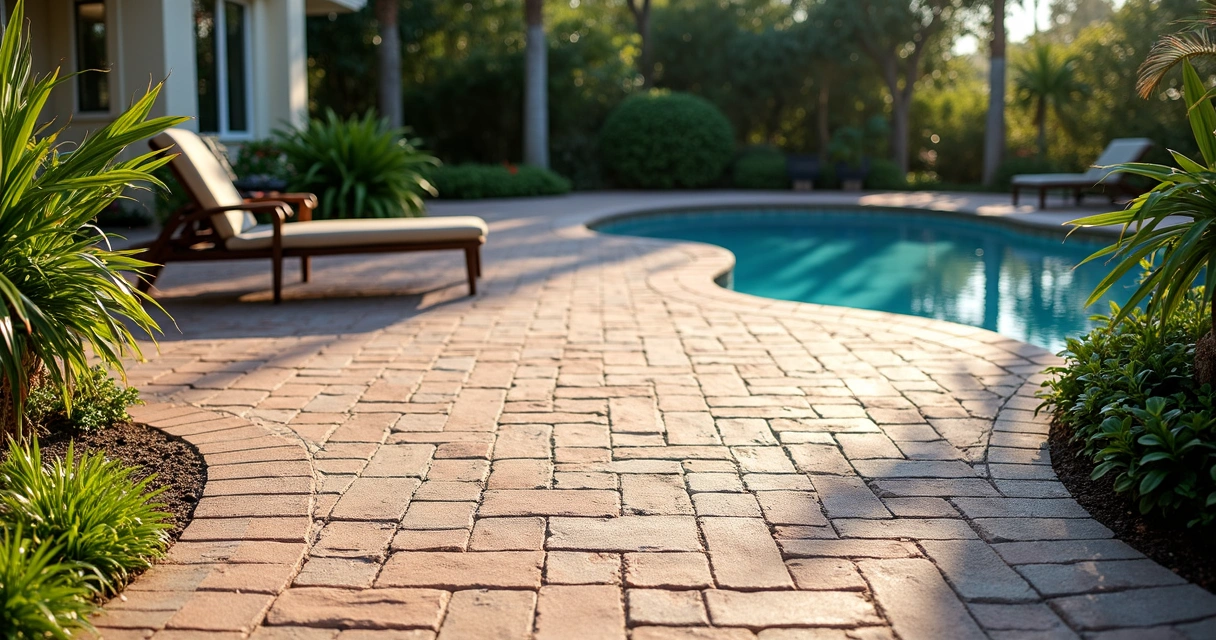
When the summer storms roll through Central Florida, it’s not just rain pelting down. There’s erosion, runoff, shifting soil, and water pounding across surfaces. For hardscapes like brick or concrete pavers, this often means something very specific: the sand or joint material between the pavers starts to disappear. This process is called joint washout.
Joint washout leaves gaps between the pavers. Over time, those gaps get bigger, the pavers wobble or settle out of alignment, and weeds—or worse, ants—move in. Sometimes whole sections of a walkway start to sink. While these problems might seem cosmetic at first, they often signal bigger issues below the surface, including drainage failures and base layer erosion.
If the base moves, the pavers move. Stopping the cycle starts with correct repair.
Why does Florida get hit harder by this problem? Several factors stand out:
- Summer storms bring high volumes of water in short bursts.
- Sandy, shifting Florida soils let water flow quickly—sometimes too quickly.
- Frequent storms mean frequent, repeated erosion of joint sand.
- Improper or aging drainage compounds the effect, trapping water under paver surfaces.
According to National Weather Service research, extreme El Niño seasons can increase the frequency and intensity of storms in Florida, leading to more joint washout events in hardscapes.
Typical symptoms of joint washout in Florida paver projects
In our experience across Orlando, these warning signs mean it’s time to act:
- Sand visibly missing from joints—sometimes showing “troughs” between pavers
- Loose, wobbly, or uneven pavers after heavy storms
- Growth of weeds, grass, or small anthills in the joints
- Pooling water or runoff eroding the sand (instead of soaking through it)
- Cracking, heaving, or settled areas adjacent to washed-out joints
Addressing the underlying drainage and joint integrity is always better than patching over the problem.
Addressing washout early prevents bigger repairs later—like paver reset, subbase replacement, or full surface restoration. We have seen firsthand how a fast, thorough repair helps homeowners save both time and money.
What causes joint washout, and why is it worse in Florida?
The answer lies in weather, soil, drainage design, and sometimes the joint material itself.
Most Florida patios and walkways use brick or concrete pavers set on a compacted base. The interlocking pavers are held in place with sand or a sand-like product swept into the joints. Many projects use polymeric sand, which hardens when dampened and interlocks pavers tightly. While this seems ideal, recent guidance from University of Florida IFAS highlights that polymeric sand, being almost non-porous, can actually increase runoff instead of letting water soak through the joints.
- Heavy rainfall events send water over paver surfaces rapidly. If the sand is missing or blocked, water scours out whatever remains.
- Improperly compacted or non-draining base layers let water pool under the pavers, undermining the sand and the pavers above.
- Paver edges at low spots or near downspouts are particularly vulnerable—rainwater rushes to these areas, accelerating erosion.
Our experience matches what is outlined in National Weather Service’s flood and flash flood resources: failing to provide good drainage or ignoring flood risk almost always leads to outdoor surface damage.
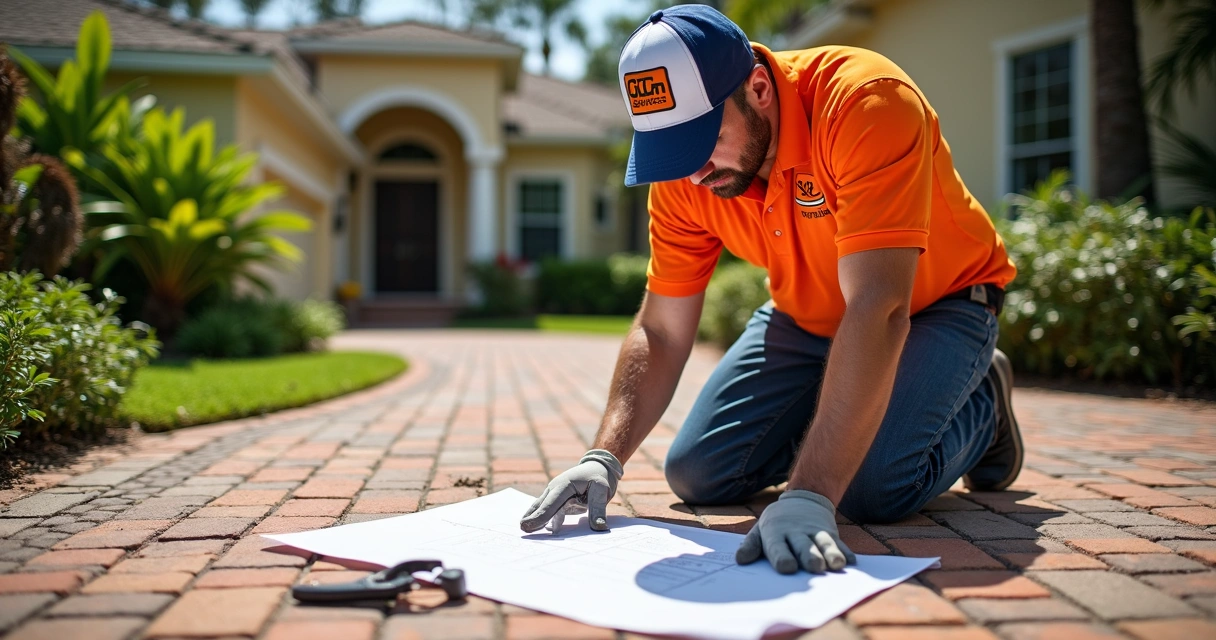
Assessing the damage: When do you need to repair?
We encourage clients to take a close look at their paver patios, driveways, and walkways right after major storms. Key signs for immediate repair are:
- Pavers moving when stepped on
- Noticeable dips or sunken spots post-storm
- Visible base material (crushed stone or sand) showing through the joints
- Areas where joint sand is completely gone
In these cases, simply sweeping in more sand is rarely a lasting fix. Instead, a careful approach to removal, cleaning, compaction, and correct sand choice makes surfaces last much longer.
A stitch in time saves nine—especially for paver surfaces after a Florida storm.
How to repair paver joint washout, step by step
At GCM Best Services, we follow a proven, repeatable process. Here is our go-to guide for tackling paver joint washout the right way:

Step 1: Clean out remaining joint sand and debris
All loose joint material, weeds, and debris must go. We use a combination of pressure washing (on the lowest setting), hand tools, and sometimes narrow vacuums to ensure joints and paver sides are exposed. Any organic debris or compacted dirt left behind will keep new sand from bonding and cause problems later.
Step 2: Assess base condition and drainage issues
Before refilling joints, we inspect for:
- Base layer erosion (look for dips, hollows, or heaving)
- Paver edge movement
- Drainage patterns—where water flows, pools, or runs off the surface
In some cases, we recommend checking out advanced drainage solutions, especially for sites with recurring problems. Our team often refers to best practices outlined in effective drainage solutions for brick paver installations in Florida’s climate for this stage.
Fixing drainage now means less maintenance down the road.
Step 3: Reset and recompact unstable pavers
If any pavers have shifted, this is the time to pull them up, restore the base material underneath, and reset them level with their neighbors. Light compaction with a hand tamper (or a plate compactor for larger surfaces) brings stability back to the field.
Pay special attention to the edges and corners—these are common washout and failure points where water pressure builds up.
Step 4: Refill joints with the right sand or joint material
Whether to use polymeric sand or regular joint sand is a big topic in Florida. According to the University of Florida IFAS, polymeric sand may block water infiltration and actually lead to higher stormwater runoff, which means it is sometimes not the best choice for all locations.
- Sweep in new joint sand, making sure it reaches the full depth of the paver. Use a push broom, tapping gently to settle sand.
- If using polymeric sand, carefully follow manufacturer instructions for watering and curing.
- On sites where drainage is most important, standard clean angular joint sand is often the better choice to let water soak through and minimize runoff.
On some Orlando projects, we combine traditional joint sand for most of the field with a narrow band of polymeric sand at the paver edges, especially where towels or walkways meet planting beds.
Balance drainage needs with weed resistance and washout risk.
Step 5: Seal, sand, and inspect the whole surface
We always end with a careful cleaning, then seal or sand as required. High-quality joint sand should sit just below the paver chamfer (bevel) but never billow up above.
Proper sealing, while not always necessary, extends the life of the joint material by locking it in place and helping with stain prevention. Our hardscape specialists review each project and adjust this recommendation based on sun exposure, expected foot traffic, and stormwater patterns.
Choosing the right sand: Polymeric, regular, or specialty options?
The joint material you use will decide how long your pavers last after a storm. Here’s what sets the options apart:
- Regular joint sand: Clean, well-graded, angular sand that allows some water through—best for most patios and walkways where drainage matters most.
- Polymeric sand: Contains additives that harden with water, making for a surface resistant to weed growth and light washout, but can worsen runoff by sealing joints (per University of Florida IFAS) and sometimes accelerates joint loss in severe storms.
- Specialty sands: Some mixes include anti-ant or anti-moss additives as well as improved gradation to settle deeper into joints.
Our team’s projects across Central Florida often favor regular, clean sand swept into joints for maximum drainage, with edge reinforcement as needed. In certain commercial walks or near pools, we use polymeric sand—but always combined with careful drainage design.
Why drainage is the secret to durable paver joints
Every year, we see new clients needing paver repairs simply because runoff or standing water undermined the base or scoured out the joints. The top ways to fix the problem at its source include:
- Correcting slopes so water runs off surfaces at a gentle angle
- Installing French drains, surface grates, or catch basins to collect and redirect stormwater
- Building a deeper, fully compacted base layer under pavers
- Using permeable edging and border details to limit water “pinch points” where flow concentrates
- Maintaining clean gutters, downspouts, and directing roof runoff away from hardscape
The effective drainage solutions for brick paver installations guide offers a deep look at proven methods for permanent fixes.
Stormwater management is as important as the materials you choose.
The Florida lightning climatology page reveals just how intense storm cycles can be in our region. While lightning itself may not destroy pavers, it highlights broader risks to outdoor structures exposed to Florida’s weather cycles.
Preventing future joint washout: Pro tips for Florida surfaces
- Inspect after each major storm—especially during the rainy season.
- Remove leaves, debris, seed, or mulch sitting on the joints to prevent water barriers and spongy spots.
- Top up joint sand periodically rather than waiting for gaps to appear.
- Seal joints if the surface is mostly shaded or lightly sloped, but leave open, permeable joints where water must soak through.
- Regularly check for ants or weed growth, and treat trouble spots early.
Our article on how to prevent weeds from growing between pavers in Orlando offers practical steps for ongoing care between major storm events.
Frequent, low-effort maintenance saves big headaches later.
When to call a professional for paver joint repair
Simple repairs—like sweeping in a bit of sand—can be handled by many homeowners. But if your space has:
- Extensive heaving or sinking (sections 5 feet or more in size)
- Heavy or repeating joint washout through every rainy season
- Mud, silt, or organic material mixed in the joint sand (signals base erosion)
- Complaint paver resets or obvious drainage failures
That’s when it’s time to call our team at GCM Best Services. We bring experience, professional compaction tools, durable sand choices, and rapid scheduling across Orlando and Central Florida. Our free assessments mean you know exactly what’s happening underneath, not just what you see on the surface.
Combining paver repair with upgrades and enhancements
Since many paver repairs after a big storm mean touching up the base, it’s a perfect time to make small upgrades:
- Install low-voltage lighting in joints or along edges for evening safety
- Upgrade joints near pools or outdoor kitchens with antimicrobial or higher‑drainage sands
- Replace broken or damaged pavers for a refreshed overall look
If you have old, faded, or broken pavers—or want an updated look—visit our driveway and patio paving services page for Orlando. Small changes during repair can save on future costs and add to home value.
Conclusion: Protecting your paver surfaces and investment
Paver joint washout isn’t just a problem for looks. It’s about keeping your spaces level, safe, and strong—ready for everything from backyard grilling to Florida’s wildest weather. At GCM Best Services, we combine proven methods, tailored materials, and a focus on good drainage to keep patios, driveways, and walkways standing strong, season after season.
Don’t let Florida weather get the best of your outdoor spaces. With the right repair, your hardscape can be both beautiful and built to last.
Ready for the next step? If your paver joints keep washing out, or you see signs of bigger trouble, reach out for a visit from our team.
Ready for a professional quote? 📞 (407) 250-1948 • 24–48h • Orlando, Tampa & area.
You can learn more about our hardscape solutions or browse our driveway and patio paving information for more options.
Frequently asked questions about paver joint washout and repair
What causes paver joint washout?
Paver joint washout happens when water—from rain, storms, sprinklers, or even roof runoff—forces sand or joint material out from between pavers. In Florida, heavy rainfall, sandy soil, and slopes without proper drainage can make this worse. Sometimes, using the wrong sand (like polymeric sand in high-drainage areas) or failing to maintain joints can speed up washout.
How to fix paver joint washout?
We recommend a stepwise process: remove loose material, clean the joints thoroughly, assess and fix any subsurface or drainage problems, replace missing base layer where needed, reset any loose pavers, and sweep in the right joint sand (regular or polymeric, depending on your situation). Detailed repair guidance is above, or you can reach out to GCM Best Services for help custom to your site.
What is the best sand for joints?
The best sand depends on your drainage, sun exposure, and expected use. Clean, angular joint sand is ideal where drainage is most needed. Polymeric sand resists weed growth and locks in joints, but may increase runoff and can break out in storms, as noted by University of Florida IFAS. For most of our Orlando and Central Florida projects, a good, clean joint sand is the go-to, with edge reinforcement as appropriate.
How much does paver repair cost?
Costs depend on the damage’s extent, materials used, and site access. Basic sand refills are minimal (material only), but if multiple pavers must be reset or drainage improvements are needed, repairs may range from a few hundred to a few thousand dollars. At GCM Best Services, we provide free on-site estimates, so you have a clear view of scope and cost before work begins.
Is sealing pavers after repair necessary?
Sealing isn’t always necessary, but it can help stabilize joints, repel stains, and keep pavers looking their best. Shaded areas and patios with moderate traffic may go unsealed with good joint sand, while sunny or high-traffic walkways benefit from quality sealers. We always match the coating to the site’s exposure and your maintenance preferences.