Keeping outdoor areas looking sharp isn’t just about first impressions. At GCM Best Services, we know the humid, sun-intense climate of Orlando and Central Florida can challenge even the hardiest paint jobs. Touch-ups are often needed well before a full repaint is due, but to get results that truly last, preparation and process matter more than many realize. We’d like to walk you through what makes for strong, reliable touch-ups on exteriors, with practical guidance shaped by experience, building codes, and a solid respect for your property and safety.
Why outdoor paint touch-ups matter
People notice when paint flakes or peels. But the implications are more than skin-deep. Unaddressed blemishes can become costly repairs as moisture intrusion, sun damage, and mold take hold. We’ve seen how regular, high-quality touch-ups keep exteriors resilient and inviting. If you leave flaws unchecked, surfaces deteriorate quickly, especially in Florida’s unique conditions. Good touch-ups buy time and save money by extending the period between major repaints.
Small repairs done right today prevent big problems tomorrow.
What causes paint to fail outdoors?
Understanding why outdoor paint fails is the starting point for any touch-up project. Here’s what we find most often:
- Sun exposure: UV breaks down paint binders, making colors fade and surfaces powdery.
- Moisture: Humid air, afternoon storms, and sprinkler overspray seep behind paint, leading to bubbling or peeling.
- Biological growth: Algae, mildew, and mold are common in warm, shaded areas.
- Poor surface prep: Painting over dirt, chalk, or failing paint leads to fast failure.
- Wrong paint type: Not matching paint chemistry to the surface and climate can lead to quick peeling.
Every one of these can be mitigated by best practices—before and during the touch-up process. Let’s outline what that looks like in the real world, especially for Central Florida properties.
Best practices before starting an outdoor touch-up
Before you ever open a paint can, good planning is vital. Here are the steps we consider non-negotiable for our clients at GCM Best Services:
Assess the surface thoroughly
We always start by walking and inspecting every area to find:
- Chalking, peeling and discoloration
- Moisture stains or soft spots
- Previous repairs, mismatched paint, greasy residues
- Possible lead-based paint on buildings built before 1978
If we spot lead-based coatings, we reference up-to-date EPA guidance on safe work practices to keep everyone healthy and compliant. Nothing stalls a project like not respecting these safety protocols, and—frankly—they’re there for good reason.
Choose the right time for painting
Timing matters more than many realize. We plan outdoor touch-ups for dry, mild days—usually avoiding the hottest midday sun and days following heavy rain. This helps prevent “flash drying,” wrinkling, or trapping moisture under a new coat.
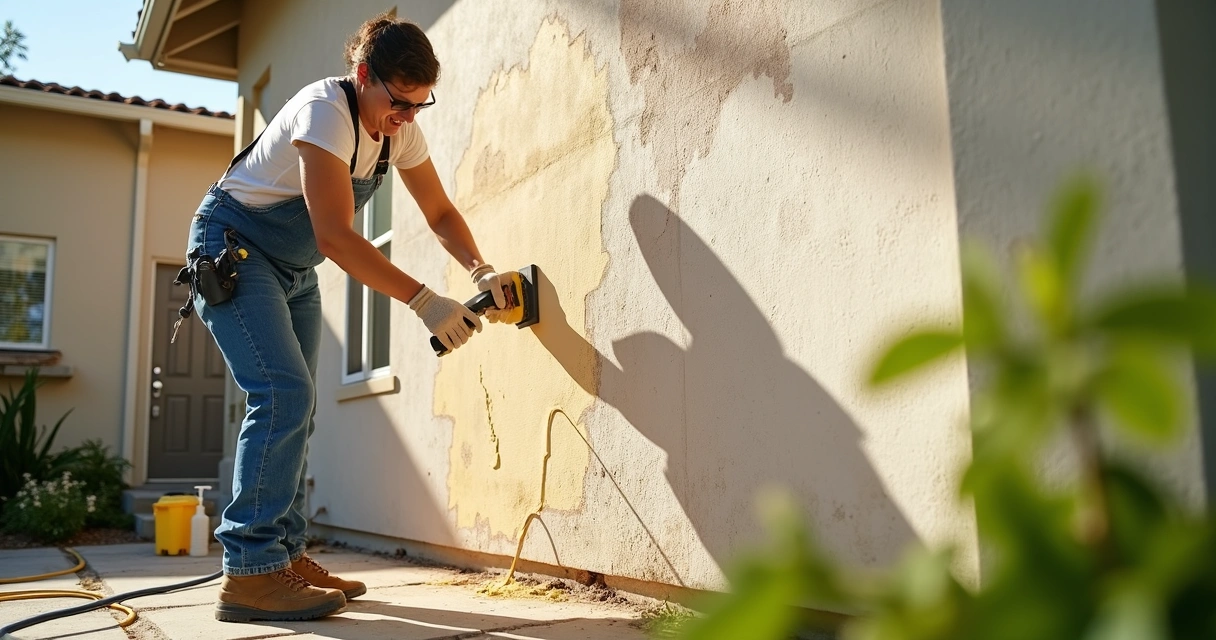
Surface preparation: The foundation of lasting touch-ups
Preparation is, by far, the most important step for strong touch-ups. In our experience, we’ve found these techniques to be essential:
- Clean the area: Remove all dirt, chalk, algae, and mildew. For most surfaces, a gentle scrub with detergent and, if needed, a diluted bleach solution (rinsed off completely) returns the surface to a paintable state.
- Sand or feather edges: We use sandpaper or a sanding block to smooth the transition between bare substrate and existing paint, preventing “picture framing.”
- Repair before painting: Holes get filled with the appropriate patching compound; caulking is applied to gaps or cracks, with time for proper curing.
- Prime exposed surfaces: Any area sanded to bare substrate—or patched—needs primer tailored for the surface (masonry, wood, metal), providing both coverage and adhesion.
We sometimes see people skip priming because it “looks close enough already.” But primer’s job is unseen—it seals and bonds, which is crucial for Florida’s high rainfall and humidity.
Choosing the right paint for your touch-up
Not all paints are created equal. In Central Florida, we focus on products that handle sun, mildew, and rain with durability and color retention. Here’s how we guide our clients when choosing outdoor paint for touch-ups:
- Match paint type to original: Use latex on latex, oil on oil, and masonry-specific coatings for concrete or stucco.
- Pick “exterior” formulas: These include UV blockers, mildewcides, and flexible binders.
- Select gloss level: Satin or semi-gloss is easier to clean and resists the elements longer than flat.
- Color match with precision: We take chips to paint stores for computer matching—or use leftover labeled cans, when available.
One tip: Always buy a bit more than you think you need. Each batch, even if mixed “the same,” can show slight color shifts. Having some leftover lets us handle future touch-ups with confidence.
How to handle weather and environmental challenges
Orlando’s weather brings quick changes, and we plan every job around it. Here are ways we adapt our process for local conditions:
- Monitor humidity and rain: Paint only when humidity’s below 85% and rain isn’t forecast within 24 hours.
- Paint in the shade: We work around the building, following the sun, so fresh paint doesn’t dry too fast and “blush.”
- Watch for wind: This prevents dust or debris from embedding in wet paint.
- Adjust drying times: Cooler or humid days stretch drying time, so we set safe re-coat intervals to avoid tacky finishes.
If weather turns, it’s better to pause than risk a failed job—the right day always makes a difference.
Applying paint for seamless touch-ups
Once prepped, the way paint is applied determines how visible—or invisible—the touch-up will be. Here are the key steps GCM Best Services recommends for a smooth result:
- Mix and test: Stir paint thoroughly. If working from a new can, we brush a small patch and let it dry, confirming color and sheen.
- Use proper tools: We match our applicator (brush, small roller, or pad) to the size and texture of the area. For rough stucco, a thick-nap roller is best; for trim, a high-quality brush keeps edges crisp.
- Feather edges: Start painting just outside the repair and blend into the old paint with lighter pressure, avoiding hard, obvious lines.
- Layer as needed: Some colors, especially deep ones, need several coats for full coverage. We allow full drying between each pass.
- Check finish in daylight: Some mismatches only show in bright sun. Reviewing the finished area from several angles helps confirm a true blend.

How to maintain your touch-ups for longer life
Even the best paint needs help to keep looking good. After a touch-up, these steps help the work last:
- Clean surfaces regularly: Gentle washing twice a year keeps algae and dirt from breaking down paint.
- Trim vegetation: Keep shrubs and sprinklers away from walls to avoid constant moisture and abrasion.
- Inspect every season: Walk around and check for new cracks, chips, or mildew. Early fixes cost less.
We share specific maintenance tips with our clients, and we recommend a schedule tailored to Central Florida’s climate. Simple, regular care can double the life of a touch-up.
When a touch-up isn’t enough
Sometimes, touch-ups won’t solve deeper issues. We suggest broader repainting when:
- Pervasive peeling affects more than 20% of a surface
- Widespread water intrusion is detected
- Paint failure is a symptom of substrate or caulking failure, not just wear
- Mismatched or faded paint can’t blend visually, even with expert application
In such cases, it’s more practical—and ultimately less expensive—to tackle a full-area repair. When in doubt, we provide a clear before-after comparison and help you decide the best route.
Common pitfalls: What we avoid
Even experienced DIYers fall into traps. These are mistakes we routinely help clients avoid:
- Painting over chalky or dirty areas (results in fast peeling)
- Painting wet surfaces (traps moisture, causing bubbling)
- Skipping primer on bare patches
- Using interior paints outdoors
- Not checking existing color and gloss carefully
- Overbrushing or applying heavy coats, making touch-ups stand out
Every step skipped now adds work, cost, or frustration soon after. Our goal is always a finish both you and we are proud to show off.
How professional painting supports lasting results
We know that many property owners take pride in DIY repairs. Still, there’s a big difference when a licensed, insured contractor manages outdoor touch-ups, particularly in challenging climates like Central Florida. Here’s how our approach at GCM Best Services helps clients:
- Site evaluation: We catch issues DIYers often miss, from cracked stucco to incompatible old paints.
- Permitting and HOA compliance: For multifamily or commercial properties, we handle paperwork, so touch-ups don’t bring compliance headaches.
- Material specification: We source top-tier, locally tested paints—not generic “exterior” cans.
- Skillful matching: Our teams are skilled at feathering, layering, and finishing for true “invisible” touch-ups, even on older surfaces.
- Warranty and documentation: We back our work with written warranties and before/after photos.
- Efficient scheduling: Our night and weekend crews minimize residential and retail business disruptions.
We encourage everyone to consider the true cost of their time and materials—sometimes a professional touch truly pays for itself.
Beyond walls: Touch-ups for concrete, trim, and other outdoor features
Outdoor paint isn’t just for siding. At GCM Best Services, we take a broad view, because paint and coatings protect surfaces from the Florida elements everywhere:
- Driveways and patios (learn more on our driveway and patio paving service)
- Concrete walkways and slabs (licensed concrete repair guidance)
- Hardscaping elements like garden walls, curbing, and steps (hardscaping projects)
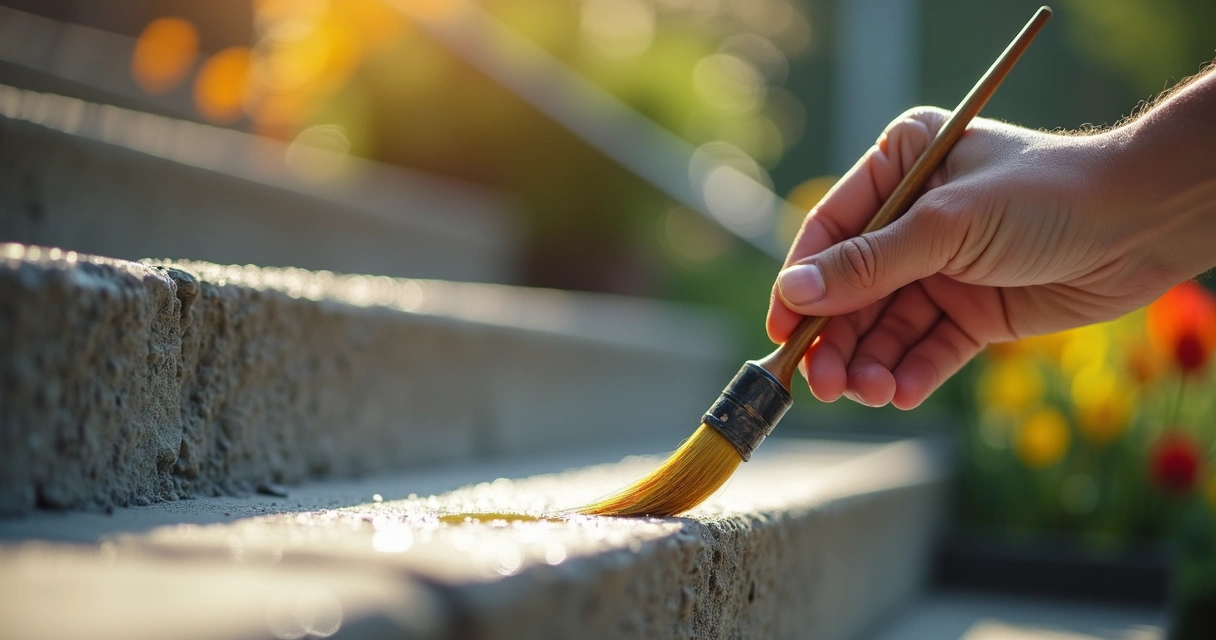
With specialized masonry coatings, anti-slip paint for steps, or elastomeric finishes on stucco, we help clients find the right approach. Our advice is always rooted in local conditions—humidity, rainfall, and that persistent Florida sun.
Integrating touch-ups with a long-term exterior maintenance plan
Touch-ups are most effective as part of a regular maintenance program. We recommend clients:
- Schedule inspections seasonally, especially before and after storm season
- Keep records of paint brands, colors, and batch numbers for easy matching
- Plan periodic cleaning with the right products for painted surfaces
- Check detailing work—caulked joints, trim paint, and repairs on hardscaped areas (see best practices for concrete)
For owners managing driveways, patios, and pavers, combining painting with smart drainage improvements can also keep surfaces looking brighter for longer (tips for crack prevention).
Summary: Our top outdoor touch-up advice
- Always prep surfaces with care—cleaning, sanding, patching, and priming.
- Choose paints and primers for your material and climate.
- Follow weather and curing best practices every time.
- Apply touch-ups with the right tools, blending for invisibility.
- Schedule regular cleaning and inspection of all exterior surfaces.
We’re proud to help keep Central Florida’s homes and businesses both attractive and protected. Touch-ups done right provide a fresh face and real peace of mind—often with less cost than people expect.
Lasting results come from doing the small things well, every time.
When you’re ready for results that endure, our team is here. Start with on-site advice, accurate color matching, and an honest recommendation for your property—so every touch-up is a true improvement.
Frequently asked questions about outdoor paint touch-ups
What is the best paint for outdoors?
The best paints for outdoor use are labeled as “exterior” and formulated to resist sun, rain, and mildew. For Florida, we prefer 100% acrylic latex or specialized masonry paints—they last longer, flex with surface movement, and clean up easily. Always match the paint type (latex/latex, oil/oil) and finish to the original coating for the smoothest blend.
How to prepare surfaces for touch-ups?
Preparation is the single most important part of a lasting touch-up. Clean away all dirt, chalk, algae, or mildew. Sand any rough, peeling, or glossy areas until smooth. Patch holes and caulk cracks with appropriate, paintable fillers. Prime any bare or patched spots before you repaint. Following safe work practices, especially on older homes, is advised; see the EPA’s guidance.
When is the best time to paint?
The best time for outdoor touch-ups is during dry, mild weather with daytime temperatures between 50°F and 90°F. Avoid painting in direct sunlight (it may dry the paint too fast) and never apply paint when rain or high humidity is forecast. Early mornings or late afternoons, when surfaces are dry and shaded, are often ideal in Central Florida.
How can I make touch-ups last longer?
There are three key points: prep surfaces thoroughly, use top-quality paints and primers, and maintain your painted areas. Clean and inspect the exterior twice a year, keep vegetation trimmed, and touch up any new chips or cracks before they grow. Shielding painted surfaces from sprinklers and runoff also extends their lifespan significantly.
Is it worth hiring a professional painter?
Hiring a professional is worth it when you want the repair to be truly discreet, durable, and code-compliant. Experienced contractors like GCM Best Services spot issues that might otherwise be missed (like hidden moisture or structural damage), match colors precisely, and apply paint for the best blend with surrounding areas. For projects involving ladders, intricate details, or older substrates with possible lead, expertise and proper insurance matter even more.
Ready for a professional quote? 📞 (407) 250-1948 • 24–48h • Orlando, Tampa & area.