Living in Central Florida, I’ve learned something: water doesn’t play by the rules. One hour, it’s a blue sky. The next, sheets of rain spill over your yard, patio, or new driveway. Concrete here faces not just water, but water with a stubborn personality—a tendency to pond, slip under the surface, and create headaches later on. After years of working with property owners, what sticks out to me most is this truth:
Don’t plan your drainage, and the water will do it for you.
So, if you’re thinking of pouring new concrete—maybe a driveway, sidewalk, patio, or a big slab for a project—planning for drainage isn’t just smart. It’s non-negotiable. I want to guide you through how to do it, what mistakes to dodge, and why local specifics matter so much. Because, as I’ve seen at GCM Best Services, careful drainage planning is the key to concrete that stays beautiful, strong, and dry in Central Florida’s wild climate.
Why proper drainage is different in Central Florida
Let me start with a local reality: Florida sits atop ancient limestone, full of sinkholes, shallow water tables, and a climate famous for both sudden storms and long dry spells. Traditional drainage solutions from other regions rarely fit here.
- Downpours drop inches of water in minutes.
- Soils range from loose sand that drains too fast to clay-rich areas that hardly drain at all.
- HOA and city ordinances are strict—they want managed runoff, no water heading to your neighbor, and no swampy yards.
What does that mean? When you pour concrete here, the risks aren’t just cosmetic cracks or small puddles. If you ignore drainage, you can face slab settlement, algae growth, wood rot at the house, and even groundwater contamination. Several reports, such as the University of Florida’s Design and Construction Standards, urge planning for all these factors. That’s why projects with GCM Best Services always start with a conversation about water.
How water behaves around concrete
I’m fascinated by how water acts around a slab or driveway. Water follows gravity, but it always looks for the easiest path down, especially when there’s a potential to sneak under a hard surface.
- Surface runoff: The biggest volume of water, from rain or sprinklers, runs downhill on the surface. This is what creates visible puddles or washes dirt onto your new slab.
- Subsurface seepage: In some spots, water pushes through soil just beneath the concrete. This can create soft spots and eventually lead to cracks.
- Hydraulic pressure: With Florida’s frequent rainfall, water can build up underneath a slab, especially if it’s not vented or has no path to escape.
Decades of University of Florida concrete materials research shows that even tiny changes in slope or soil type will affect where water goes. You can’t see hydraulic pressure, but you can sure see what it does months down the line: sunken edges, spalling, algae blooms, and surface cracks. I’ve seen driveways ruined this way after one rainy season.
Main drainage strategies: What actually works?
Most concrete drainage solutions in Central Florida boil down to two things: shaping where water goes, and giving it somewhere safe to go. There’s science, but also a bit of art, and a whole lot of trial-and-error. Over time, I’ve seen what just works—especially when you want your slab to last and your HOA (and neighbors) to stay happy.
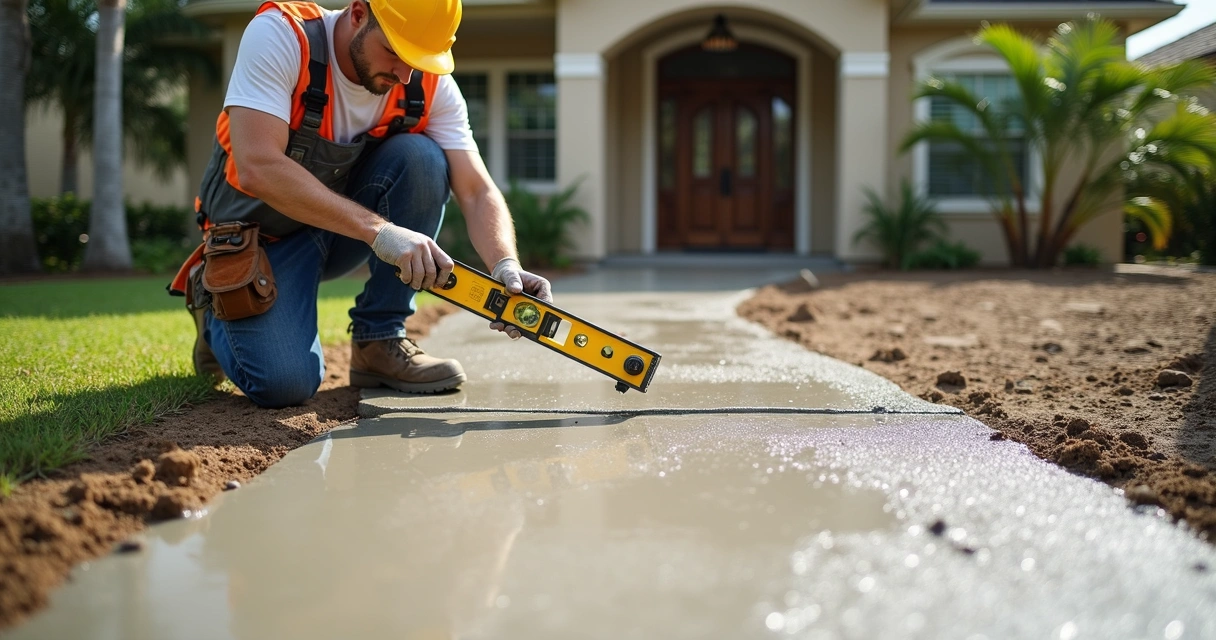
Slope is everything
The most effective form of drainage is built right into the design: slope, or “pitch.” For outdoor slabs, driveways, and sidewalks, the surface needs to carry water far enough away from the slab and any nearby structures.
- A minimum slope of 1/8 inch per foot (1%) is the bare minimum. For Florida, I often aim for 1/4 inch per foot (2%) for driveways and patios that need to drain quickly after a cloudburst.
- Slope should direct water away from your house, not towards the foundation, doors, or low-lying flowerbeds.
The trick is making it look flat to the eye but have just enough slope to work. You can see more slope details for local jobs in the St. Cloud concrete driveways and patios installation guide we’ve put together.
Perimeter drainage and edge details
When the ground is nearly level, or you’re boxed in by landscaping, adding simple slope isn’t enough. I often add in:
- Swales: These are shallow, grassy dips running along slab edges. They catch runoff and move it towards a safe discharge point. They’re subtle, and the grass keeps erosion at bay.
- French drains: A row of gravel and perforated pipe, just beyond the concrete, buried in a trench. These collect water that leaves the slab and allow it to filter away underground.
- Surface drains: For flat driveways, installing surface “channel” drains collects water right at the concrete and moves it away in a controlled path—no more running across your sidewalk into the street.
For walkways or areas boxed by buildings, pipe extensions often direct water under landscape beds and out to the yard. The details matter: without the correct outlet point, you only move the problem further down.
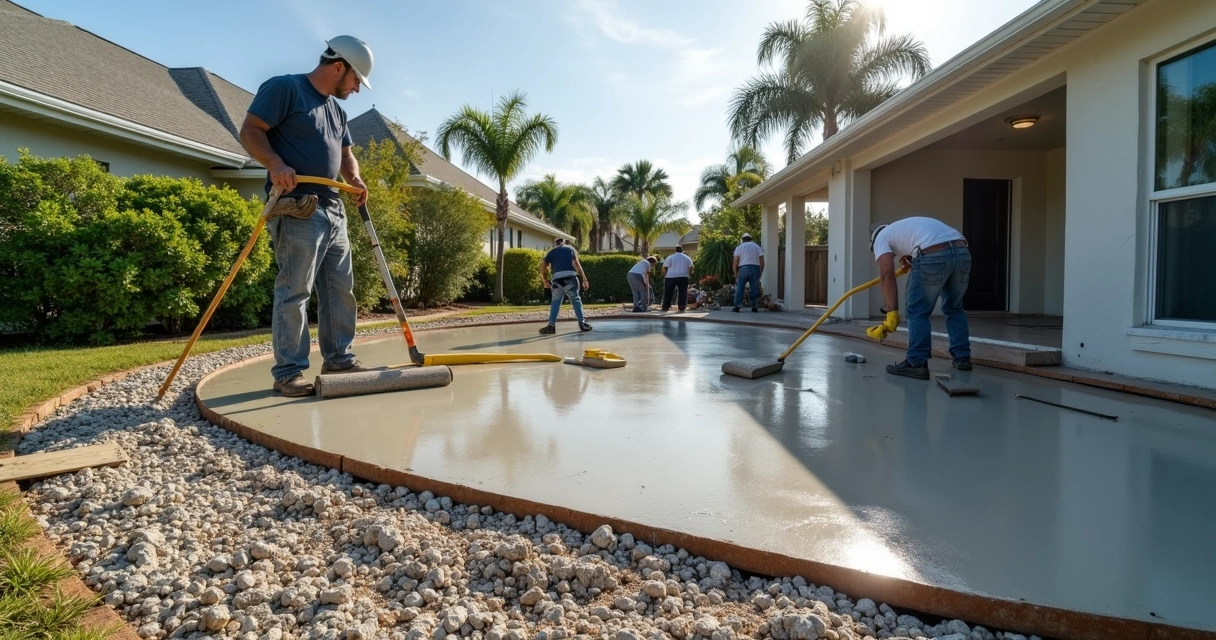
Managing underground water: Sub-base and soil prep
This is the hidden drainage most people forget. If your base is poorly compacted or full of loose sand, rainwater will pool underneath the slab, washing away support or even triggering settlement.
- GCM Best Services always installs a compacted sub-base: typically 6 to 8 inches of crushed concrete or stone, compacted in layers.
- For sites with known water issues, installing a layer of heavy-duty geotextile fabric or a gravel “capillary break” keeps capillary action from pulling groundwater toward the concrete.
- Waterproof membrane isn’t always necessary, but for patios near houses or in clay zones, it’s peace of mind.
If you’re wondering about the science, the USGS Floridan Aquifer System study explains Florida’s unique subsurface water pathways, from hidden streams to karst features that impact slab behavior. It’s nerdy, but if you’re planning a big job, well worth skimming.
The process: My step-by-step approach to drainage planning
Maybe you’re a planner, or maybe you’d rather “figure it out as you go.” I say, if you take 30 minutes to plan concrete drainage up front, you’ll avoid months, or years, of headaches later.
This is the stepwise approach I use at GCM Best Services for every new concrete project:
- Site assessment: I walk every job and pay attention to where water sits after a storm, slopes in the terrain, gutter outlets, and nearby downspouts. I also look for neighbors’ high spots or tree roots that might force water onto your slab.
- Survey and measurements: Out come the string lines, stakes, and laser—measuring the fall from house to property edge, recording every low and high point.
- Slope proposal and outlet points: I design a plan to shed water towards the least problematic area: ideally a city storm drain, grassy swale, or, if allowed, the street.
- Sub-base prep: I review the soil type—sand, clay, or fill—to decide how much compaction and what thickness of base we’ll need for drainage underneath.
- Hardware decisions: If the shape, size, or rules require it, I add French drains, surface channel drains, or edge swales. Sometimes I include waterproofing or root barriers.
I review the plan with homeowners, our permits department, and, if required, the HOA. That’s so everyone knows where the water will flow—no finger-pointing once the first big storm hits.

No shortcuts: Detailing for long life
Over the years, I’ve seen what happens when the details get skipped. It’s never immediate. Six months later, you notice:
- The far corner never dries out
- Algae darkening the edge by the porch
- Fine cracks that widen with every rain
- Your neighbor complaining about runoff in his mulch
Drainage details that matter:
- Add expansion joints in wide slabs so movement (from wet-dry cycles) doesn’t create cracks.
- Use rebar or mesh as required, but also include water stops in larger slabs or those near the house.
- Seal the surface, especially if you’re using broom finishes—this keeps out the first flush of water and all the Florida dust that follows.
- Keep finish grade lower than the slab, never burying the edge in mulch, stone, or soil. The edge must “breathe.”
- Document everything! I take photos before, during, and after—the only way to prove the work was done right if questions come later.
The Florida Building Commission’s hurricane mitigation research points out that water entering concrete through poorly sealed joints is a top cause of damage in strong storms. They stress detailed sealing, flashing, and protected drainage paths to keep slabs intact during hurricane-driven rain.
Permits, codes and best practice: What the rules require (and why)
I’ve never met a neighbor, city inspector, or HOA officer who didn’t care where the water goes. Concrete jobs in Central Florida face layers of codes and permit rules. Most are sensible, especially after seeing firsthand the chaos from poorly managed runoff.
- Nearly all cities require a permit for new driveways, patios, or large slabs. The plans must include drainage details—sometimes even stamped by an engineer for big jobs.
- Many HOAs demand signed statements that water won’t leave your property or pond along the shared edge.
- Properties within a certain distance of lakes or wetlands must follow water quality guidelines to avoid pollution. USGS studies show how vital this is for Florida’s groundwater safety.
Municipal rules are not all alike, but if you follow the University of Florida’s construction standards and consult city staff (or someone like myself at GCM Best Services), you avoid costly rework and potential fines.
What about pavers, turf, or special finishes?
If you’re thinking of combining concrete with pavers or artificial turf, there’s an extra layer of drainage planning involved. For instance, paver driveways over concrete still need edge drains and sand bedding—something we detail in our guide to drainage solutions for brick pavers in Florida’s climate. Turf areas sometimes need catch basins under seams, especially in shady yards.

And if you’re using colored or stamped concrete finishes, surface sealing becomes even more important since textured surfaces can hold more water and dirt.
What to watch out for: classic mistakes
I’ve seen a lot over the years. But some slip-ups repeat across the region:
- Pouring concrete to match existing grade without considering new slope. You want “flat” to feel level, but water needs a path.
- Letting mulch, stone, or landscape beds cover slab edges, which traps moisture and causes rot or cracking.
- Forgetting about downspouts—those need to point well away from new concrete, preferably directly into grass, gravel, or a piped drain.
- Installing drains but forgetting maintenance. Even good channel drains clog with sand, grass, or palm debris if left alone.
- Not verifying where your runoff ends up. City codes and angry neighbors don’t mix, so always double-check outlet locations.
Aftercare and maintenance so drainage never fails
No system lasts forever without attention, but drainage for concrete is pretty forgiving if you stay ahead of problems. My checklist, once the concrete’s cured and weathered its first storm:
- Routinely check for ponding or slow dry spots after heavy rain.
- Power wash algae off slab edges twice a year—especially shady spots.
- Keep drains clear. A garden hose flushes out most debris from channel or French drains in minutes.
- Watch your landscaping. Roots can quickly disrupt even gravel-filled swales over a few years.
And if you notice persistent trouble, call your contractor back! At GCM Best Services, warranty visits let us spot issues before they become big repairs—something we spell out in writing on every job.
How GCM Best Services approaches drainage
I’d sum up our philosophy this way: Every concrete job begins and ends with water in mind. From the first assessment to the final walkthrough, we document drainage patterns, use sub-base blends that work for Central Florida, and always photograph the subtle details: slope, outlet, joints, and drains.
Our aim: zero surprises come rainy season—not for you, your neighbors, or the next contractor who walks your property years later. For more specific tips on slab and driveway performance, our guide to preventing cracks in Florida slabs lays out additional recommendations, including finish choices and expansion joint placement.
If you want a deeper look at methods and options, our concrete resource section explains different projects, from basic slabs to advanced drainage and finish work. And for choosing the right installer, our concrete company guide for Orlando covers the main steps I advise you to follow before signing any contract.
Conclusion: Start with the water in mind
If there’s one thing I’ve learned from years of pouring concrete across Central Florida, it’s that rainfall and runoff test every detail, every slab, every time. If you set the ground rules for water, your concrete will look great, stay safe, and add real value for the long run.
Concrete that drains right lasts for decades. Concrete that ponds will haunt you for years.
So, before you call for a quote, or put shovel to dirt, step outside the next time it rains. Watch where the water sits, where it runs, and where it stubbornly refuses to move. That’s your roadmap. If you need help plotting a safe, smart plan, reach out to me at GCM Best Services. We’d love to visit your site, answer your drainage questions, and show how clear communication leads to the best results.
Frequently asked questions
What is proper drainage for concrete?
Proper drainage for concrete means water quickly and reliably moves off the surface and away from nearby structures, so it never pools, stains, or seeps under the slab. In Central Florida, this usually involves forming the slab with a modest slope, adding features like French drains or swales along the edges, and keeping the finish grade (dirt or mulch) below the finished height of the concrete. Maintenance is also part of the equation: clear drains and free-flowing edges ensure that the system keeps working, even after years of storms. It’s all about matching engineering principles with on-the-ground observation, as local regulations and site features can affect final details.
How to plan drainage for concrete slabs?
When I plan drainage for a new concrete slab, I start by studying the natural lay of the land. I check where low spots or high spots are, where water currently runs, and if there are areas that hold water after heavy rain. Then, I specify a minimum slope—about 1/4 inch per foot for patios or driveways—to move water toward a safe outlet. Sometimes, I include French drains or grassy swales beyond the slab edge, especially if the yard is flat or boxed in by landscaping. Preventing problems means planning for both surface and subsurface flows. Final step: I document the plan and get it approved, as required by local codes. For more details, regulations like those from the University of Florida’s construction standards can help you see what local authorities expect.
Is drainage needed in Central Florida?
Yes, drainage is always needed in Central Florida—no exceptions. Between frequent downpours and soils that shift from sand to clay in a few feet, every new slab, driveway, or walkway should be designed so water moves away safely. The humid, storm-prone climate means that leaving out drainage results in puddling, slab settlement, mildew, and even water intrusion in buildings. Plus, many HOAs and cities require proof that water won’t flow onto neighbors’ land or into protected areas. Effective drainage is also a requirement if you want your concrete warranty (and peace of mind) to last.
What are the best concrete drainage options?
The best drainage options depend on your site conditions and slab size. For most jobs in Central Florida, I use a combination of:
- Built-in surface slope, at least 1/8 to 1/4 inch per foot
- Perimeter swales—a shallow dip along bedtime edges
- French drains (gravel plus perforated pipe) for boxed-in or tricky areas
- Channel drains or surface grates for large, flat driveways or patios
- Heavy surface sealing for slabs with textured finishes
The specifics vary by property, but these options work together to move water off the concrete and keep both slab and soil stable. Combining these drainage elements gives the best results for most Central Florida homes and businesses.
How much does concrete drainage cost?
The cost really depends on your slab size, slope, and what type of drainage feature you need. Simple sloped pours (to shed water) don’t add much to the base project cost. French drains can run between $15–$30 per linear foot installed. Surface channel drains, if needed, may add $30–$50 per linear foot. Edge swales, since they’re little more than shallow ditches lined with grass, are usually the most affordable option, often included in normal grading. Special waterproofing or engineered plans for drainage (especially near homes or pools) can increase cost but deliver peace of mind for years. I always recommend getting an on-site assessment—in some cases, great drainage costs less than you might think, especially when designed from the start.
Your point of view caught my eye and was very interesting. Thanks. I have a question for you.